


“How to Optimize Your Content for Authorship Success” plus 1 more | |
| How to Optimize Your Content for Authorship Success Posted: 24 Aug 2014 09:20 AM PDT
Who are you? Don't fret – this isn't philosophy class and no, we're not trying to steal your identity. One of the most important things you can do in 2014 as a content creator, is identify who you are as a personal brand by monitoring how you come across online. As a writer, it is essential that you are taking advantage of every opportunity you have to turn yourself into a developed brand. Twitter, that always-on social network that is constantly abuzz, and Google+, a social network claimed to offer incredible SEO benefits, offer two incredible ways that complement each other to solidify your digital presence. But how, you ask? Through digital authorship. Introducing Your New Best Friend: Google AuthorshipEveryone is talking Authorship, and with good reason. Google Authorship is a revolutionary function of Google that allows you to identify content you've produced, as well as the publishers you've produced content for. The purpose of Google Authorship is to help segment out true quality content from the plethora of content living on the web. Executive chairman of Google Eric Schmidt wrote in "The New Digital Age" that the true cost of remaining anonymous may be detrimental one's overall search position:
Google Authorship helps to further the notion that all content is not good content; rather, writers must have a) verified content and b) a solidified niche subject matter that they consistently produce original content about. Google Authorship helps to bridge the gap between the casual writer, and the professional content creator. AuthorRank – Myth or Legend?While AuthorRank is tough to concretely define, its origins can be traced back to 2005 (pre-historic in digital terms) and as Brian Clark puts it:
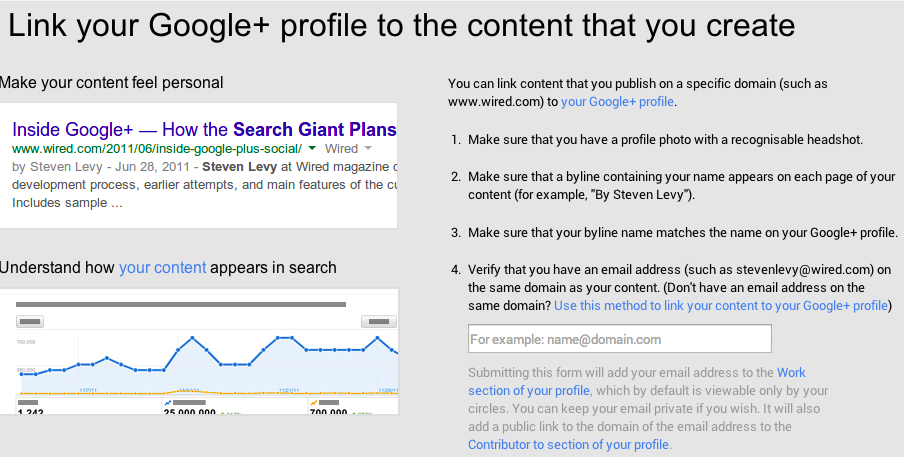
While AuthorRank hasn't officially been implemented by Google as a ranking factor, the idea behind it has already been implemented across digital marketing platforms universally. How do we know? One such sign that has the digital world up in arms is the removable of the pictures next to bylines with Authorship correctly set-up. Some are foolishly associating this cosmetic tweak with the demise of Google Authorship – which couldn't be farther than the truth. It actually represents the opposite! Google is continuing to acknowledge content produced with semantic markup as higher quality content than content without Authorship, pictures or not. Change isn't always a bad thing. Set Up Your AuthorshipSetting up your authorship is relatively easy, and requires a few lines of code in the backend of your posts, as well as a link to the publication on your Google+ profile. Google provides a step-by-step guide to authenticating your authorship here and as outlined below: You can link content you publish on a specific domain to your Google+ profile.
Cross-Checking Your Google Authorship CodeOnce you have your authorship set up, you'll want to ensure:
While you've likely heard more than enough about how to optimize your Google+ profile, have you given any consideration to your Twitter account for personal branding and authorship success? If not, you should. Twitter for Authorship? YES!In the same way that Google+ and authorship serve as an indicator of your online brand, Twitter works as a constant source of credibility via conversations. Appearance: Twitter recently unveiled a new design that is big on content and visuals. Much like the Facebook design, the new Twitter profile boosts a larger header image and profile photo. In order to have a uniform appearance across the Internet, make sure you choose a profile photo that displays your face clearly, looks professional, and is used across your various personal social properties. The new Twitter layout also highlights your tweets that get the most engagement, which brings me to our next point… Verbiage:First, create a Twitter bio that is filled with your subject matter expertise — and hashtag them to create added virality in your profile. Next, add your website, LinkedIn profile, personal blog, and tag any publications that you frequently contribute to. Beyond the content you post, your website is the only direct lead-generation tool that exists on Twitter profiles. Leave that field blank, and those viewing your page will not have an easy way to learn more about you and your content. Another great new feature is the ability to pin tweets to the top of your page. Choose a pin that not only received a good amount of engagement, but that personifies you as a brand. Keep it fresh by switching up your pinned tweets every few days! Sharing is CaringWho you follow is almost as important as what you post. Find people that are influential to your particular field, as well as publications or companies that you admire, to follow. Engage with the people you follow by commenting and retweeting, in addition to posting relevant, new information. Convince and Convert suggests that the sweet spot of curation (non self-promotional) vs. self-promotional linking to your site 25-50% of the time generates the best results. Always socialize the content you produce, but make sure to include a healthy mix of re-Tweets of informative, inspiring, and relevant content. Metadata on TwitterTwitter Cards enable you to attach media to Tweets that link your content: It's social's all-important metadata. Whether that be a summary, a summary with a photo, gallery card, app card, player card, a product card, lead generation card, or website card – Twitter cards enhance the appearance of your Tweets and add to your overall prominence on social. To set up your Twitter card, add a few lines of HTML to the backend of your site, and voila! Popular content management systems like Hubspot and WordPress offer social plugins, making this step even easier. Users who share your content will have a "card" automatically added to said Tweet, that will be visible to all of their followers. Twitter offers more information on how to set up your very own Twitter card here:
Content AttributionLastly, you'll want to look for the following metadata on each piece of content you produce to make sure it's properly attributed to you:
Why Social Optimization Matters for WritersSo, why am I yelling at you about everything from your philosophical identity to coding? Well, because, as a writer, this stuff matters. Establishing credibility as a content curator in an aggressively digital age is tough, and while you may have your authorship and Twitter perfectly optimized, there is no sure-fire way to know that you are an influential writer to your particular niche… Or, is there? Recently launched, ClearVoice is a new metric for your voice. It acts as a representative of your content's authority and showcases your publication's power. By using a first-of-its-kind algorithm, Clearvoice generates a score for writers based on:
Beyond the funky look and ease of use, ClearVoice offers the ability for writers to claim their profile. Once claimed, writers will have a unique URL that will act as a constantly updating portfolio, chronicling not only all the content you've produced, but how well it performed socially. In addition, authors can cross-check proper authorship implementation and troubleshoot with engineers if there are any issues. ClearVoice can also organically help you score jobs, as publishers can search the platform to discover writer's who are qualified in a particular field.The ClearVoice score offers an unique view into individual writers influence, as well as offers an unprecedented way for writers to be discovered. Jaclyn Freedman is the Community Manager for ClearVoice. She promotes and market brands by identifying and representing their unique voices across digital platforms. Originally at: Blog Tips at ProBlogger |
| 10 Vital WordPress Security Tips Posted: 21 Aug 2014 09:57 AM PDT This is a guest contribution from John Philips.
10 Vital WordPress Security Tips Security should be of paramount concern to any blogger or website owner. It may seem like a tedious task, but it could protect your website from becoming a hacker's playground. If your site has a revenue stream, then some time invested into security could also protect your livelihood. This article overviews a few key security tips for WordPress blogs. There's an ever growing collection of useful plugins, but it's dangerous to think that there is a single solution to website security. It's important to maintain an ongoing interest in security to provide a reliable defence against hackers. 1. Secure HostingIf you unknowingly opt for a provider which is infamous for its hosting vulnerabilities, you'll be cursing your decision at a later date. Research is the key, so allocate some time to find a reputable company with a strong security strategy. Price is likely to be the main comparison point between providers, but sometimes paying slightly more can prove to be a sensible long-term decision. 2. Work on a Secure Network with a Clean PCOne of the joys of web-based software is ease of access. It might be seriously tempting to amend a blog post when you're enjoying a coffee in your local café, but accessing WordPress on an unsecure network could seriously compromise your security. At home, where you probably have a more robust network, you should also be sure that your machine is free of malware, spyware and viruses. A sneaky key logger could undo all of your other security measures. 3. Keep UpdatedEnsure that your themes, plugins and WordPress itself are all updated regularly. There are developers out there working to protect your site, so don't miss out on crucial updates that patch the latest security vulnerabilities.
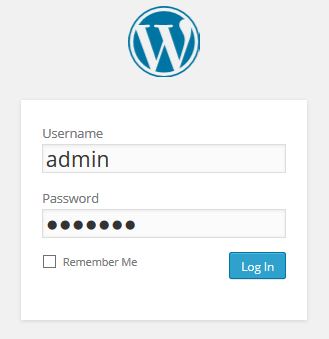
4. Strong PasswordsPasswords consisting of mainly names and correctly spelt words are extremely susceptible to brute-force attacks. Use characters, randomly mix up your capitalisation and avoid names and words. If 'petname1' is memorable for you, why not use 'P@naMe01!' – it might seem silly, but having some kind of association in your mind will enable you to remember it. Alternatively there are software solutions that store and encrypt your passwords; Roboform and LastPass are both great options. 5. Enable Secure SSL Login PagesLogging into WordPress through an encrypted channel will provide another layer of protection. Be sure to check with your hosting provider to see if you have an SSL certificate, or are utilising Shared SSL. Then add this line of code to your wp-config.php file: define('FORCE_SSL_ADMIN', true); If you want an easier option, then there is a plugin that allows SSL control of your site: WordPress HTTPS (SSL) 6. Don't Use 'Admin' as a UsernameFrom version 3.0 onwards you have been able to update your WordPress username, so you're no longer limited to using the default of 'admin'. There have been widespread attacks in the past, which have exploited the fact that millions of users still have 'admin' as their username. The easiest way to do this is to create a new user account in WordPress and give it admin access, you can then simply delete the old account.
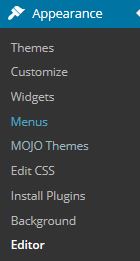
7. Hide Your Login from the Author ArchiveIt's possible to find out a WordPress user's login, simply by viewing the author archive page's permalink – i.e. http://www.example.com/author/username/ However, it's fairly straightforward to remove this. The simple solution is to use the WP Author Slug plugin. 8. Limit Login AttemptsLimiting the number of login attempts from a single IP address can thwart some hackers, especially if your site has been targeted by a brute-force attack. Thankfully there's a handy plugin – Limit Login Attempts. 9. Disable File EditingIt can be really useful to edit your theme's files within the dashboard. However, once you're happy that you no longer need to edit these files, then it's sensible to remove this functionality. This will prevent hackers from changing these files. All you need to do is access your wp-config.php file and add the following line of code: define( 'DISALLOW_FILE_EDIT', true );
10. Create Regular BackupsIt's a mundane task, and one that is often neglected. Backing up could potentially save your site from the website graveyard, it's a vital step even if you've taken all the appropriate security measures. Thankfully, there's a fantastic plugin that automates the task and removes the mundaneness – BackUpWordPress. It's a very popular plugin that's famed amongst the WordPress community for its simplicity and ease of use. Summary & Other Security PluginsNo single plugin will completely protect your site, therefore the above steps shouldn't be ignored. It's also important not to have plugins installed that you don't use. Feel free to try out some of the plugins below, but if you're not using them it's best to uninstall them. Some of the multi-purpose plugins are fantastic, but they might aim to correct certain things you may have already fixed, so assess their features to decide if it's worth installing. Login Lockdown – blocks IP addresses for a given time after repeated failed login attempts. Lockdown WP Admin – hides WordPress Admin (/wp-admin/) when a user isn’t logged in. Sucuri Security – checks your site for malware, spam, blacklisting and other security issues. Acunetix WP Security – checks your WordPress website/blog for security vulnerabilities and suggests corrective actions. iThemes Security – Formerly Better WP Security, this plugin offers over 30 ways to secure and protect your WordPress site. Still want to know more about WordPress security? If so then check out: http://codex.wordpress.org/Hardening_WordPress
John Philips is from SSLs.com. SLLs.com resells SSL certificates from the likes of Comodo, GeoTrust, and VeriSign. Originally at: Blog Tips at ProBlogger |


| You are subscribed to email updates from @ProBlogger To stop receiving these emails, you may unsubscribe now. | Email delivery powered by Google |
| Google Inc., 20 West Kinzie, Chicago IL USA 60610 | |


.jpg "Free Traffic System - Increase Targeted Website Traffic with Free
Unlimited One Way Links")

0 comments:
Post a Comment